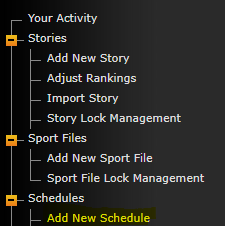
There are a few methods for adding games into a schedule, but before you can do any of that you will need to add a blank schedule into the system. To do this go to Schedules > Add New Schedule.
This will load the Add a Schedule menu. In here you will need to do the following:
1. Sport: Choose the respective Sport from dropdown menu.
2. Season: Choose the Season associated with sport from dropdown menu.
3. Schedule Title: Choosing the two options above will set the title for you. (i.e. if you selected "Baseball" and "2025", the title "2025 Baseball Schedule" will auto populate. You will have the ability to change the generated title, if you would like.
4. Display Record: This is if you want the sport's record to appear on the top of the schedule, typically you would set this to "No" for sports such as Cross Country or Track & Field.
5. Conference: Choose the conference that the sport competes as a member of. *Conference must be added in backend prior to creation of schedule in order to choose it from dropdown*
6. Downloadable Schedule: This option allows you to upload a PDF or Word version of the schedule that fans can download on the front end.
7. Downloadable Schedule Display Title: This allows you to enter a title for the schedule you had uploaded in the previous field.
8. Schedule Redirect URL: If you wish to have schedule page redirected elsewhere, enter redirect link in this field.
9. Printable Schedule PDF: You have the ability to upload a PDF version of schedule for users to print off of front end. *PDF must be uploaded to Documents tab in backend prior*
10. Show Details: This setting applies only if you are using the 'Classic' schedule version. (typically leave as is --> "Yes")
11. Exclude From Calendars: Clicking "Yes" will remove schedule from any calendars, upcoming event, recent results, scoreboards, etc., with the exception of the calendar for this sport (typically leave as is -->"No")
12. Hide Schedule?: This will hide the schedule from being viewed on the front end.
13. Note Display Location: This determines where your schedule note will display.
14. Schedule Note: This allows for a note to be posted at the top or bottom of the schedule. (i.e. "game times TBD", "games X,Y and Z were vacated", etc.)
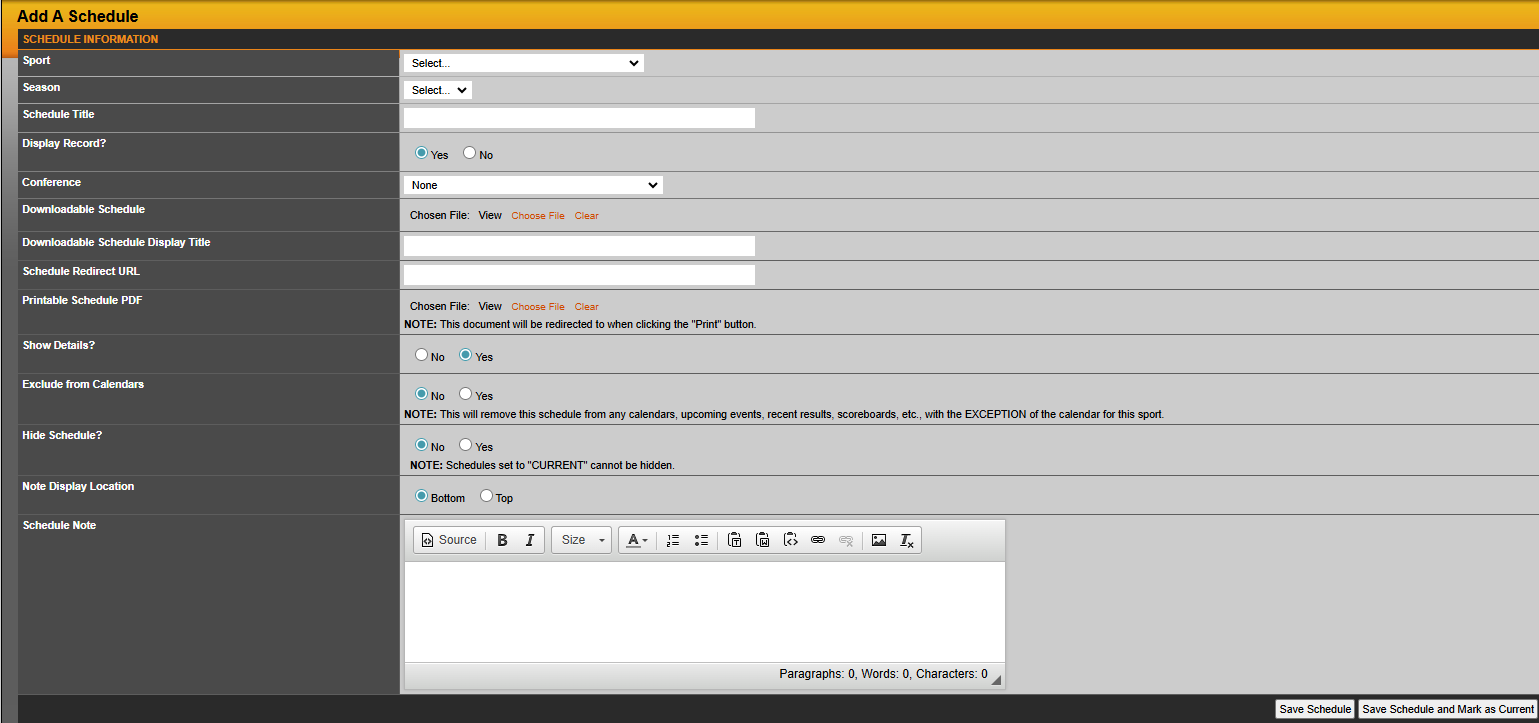
When the steps above have been completed, you can either click "Save Schedule" or if you want to Save it and have it appear as the current schedule on the site, then choose the second option "Save Schedule and Mark as Current". *You cannot have a hidden schedule marked as current
After creating a new schedule/roster, utilize this tutorial on how to set a current season
Was this article helpful?
That’s Great!
Thank you for your feedback
Sorry! We couldn't be helpful
Thank you for your feedback
Feedback sent
We appreciate your effort and will try to fix the article