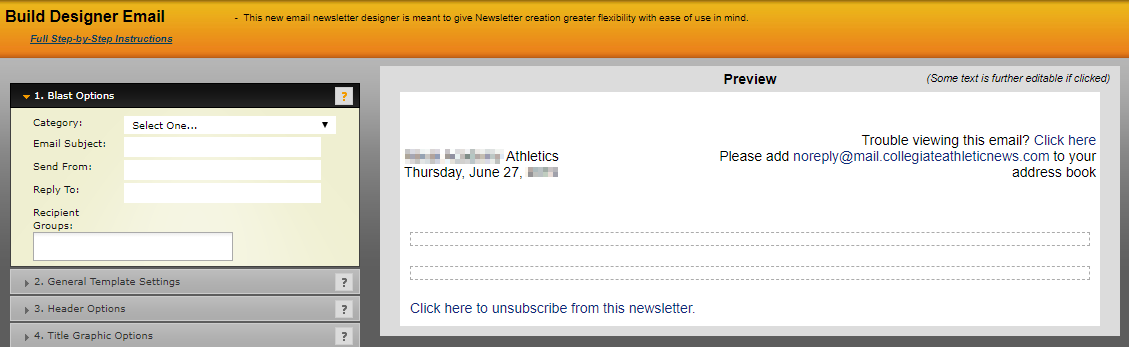
In the first step of the e-mail designer, you will setup the title of the e-mail, who is sending it and what recipients it will be sent to.
Category: Choose a category, this is used for filter in the track e-mails area on the backend.
Email Subject: This is the text that is going to appear in the subject line of the e-mails.
Email From: Here you will need to enter a valid e-mail.
Reply To: Here you will need to enter a valid e-mail, if someone were to click reply to the e-mail blast, this is who would receive that reply.
Recipient Groups: Click in the white area to see the all the currently e-mail lists you have n the system and click on the ones you want this blast to go to.
Was this article helpful?
That’s Great!
Thank you for your feedback
Sorry! We couldn't be helpful
Thank you for your feedback
Feedback sent
We appreciate your effort and will try to fix the article