In step 6 you will choose the layout you want for the Features Layout area.
There are currently ten layout options to choose from, with content areas ranging from 1 to 6 separate content areas.
BEST PRACTICE: The goal is to capture the attention of the person receiving the e-mail blast. We limit the amount of Features Layout areas available to keep the message concise.
To choose a Features Layout template, click on the card for it under the Features Layout accordion on the left. You can choose between templates, so choosing one does not mean you are stuck with it.
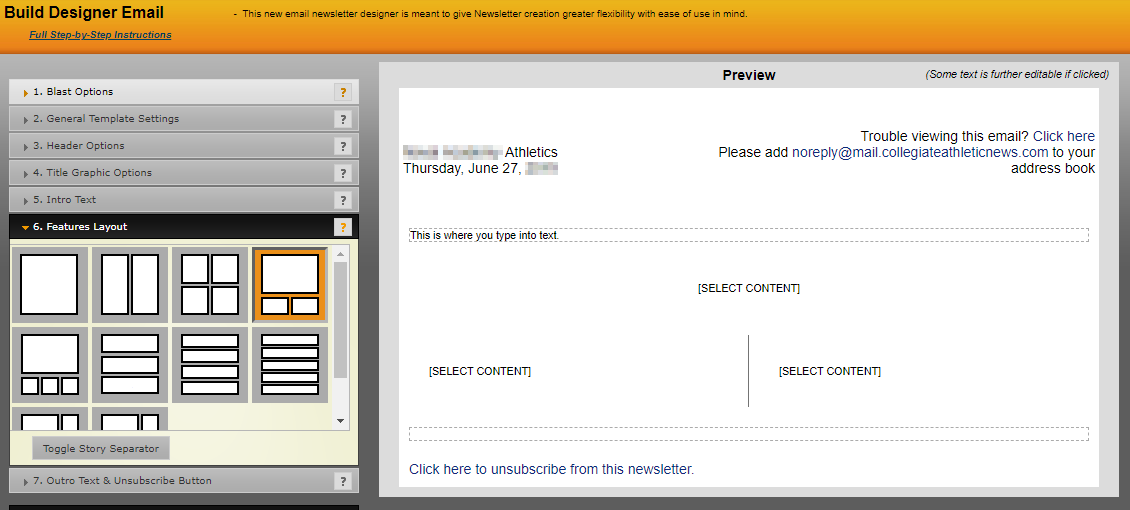
After deciding on a layout, you can then start adding content. To do this, click on the [SELECT CONTENT] text in that section and you will be prompted with an action window where you can decide on the content you want to add.
The default options are Stories/Events/Results/Navigation/HTML
Stories
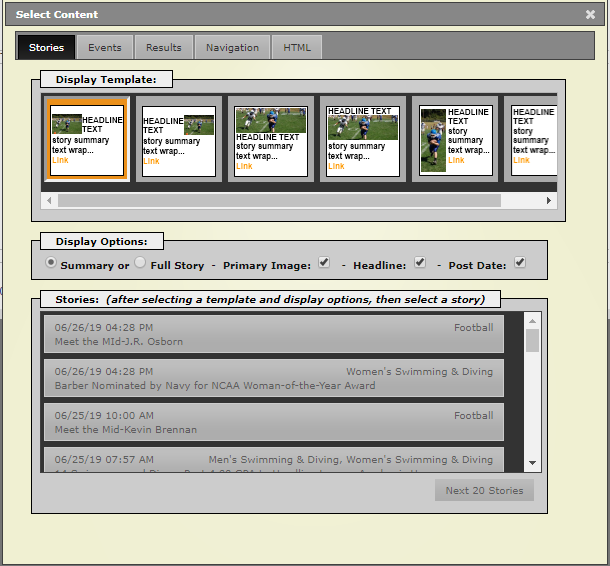
Below this are the display options, choosing between full story or just story summary and then what data to include, the primary image, headline and postdate.
The last step is to choose the story, simply click on the one you want. This will then move you back into the template area with the story chosen.
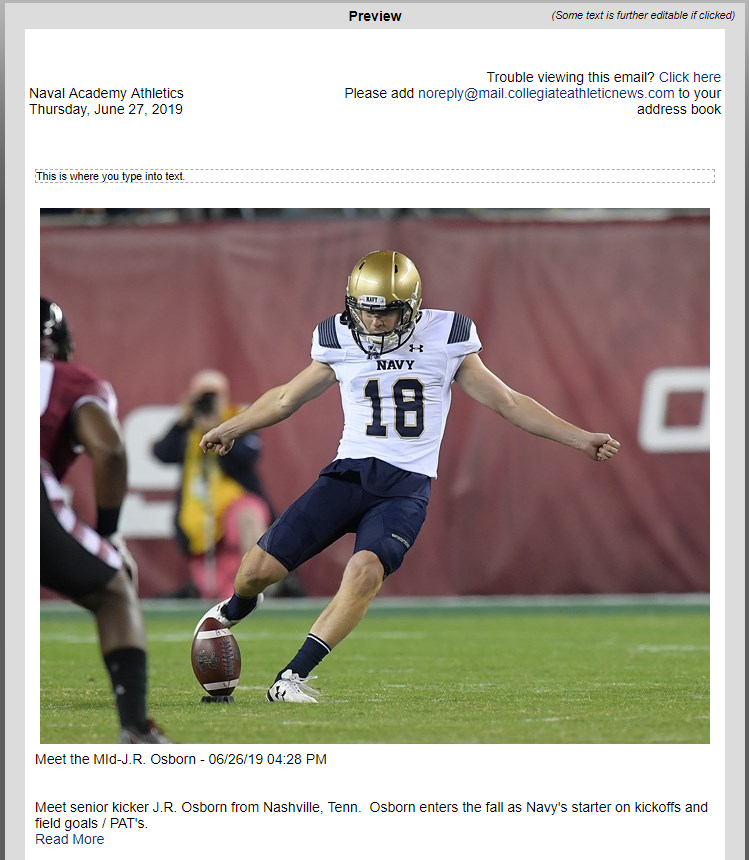
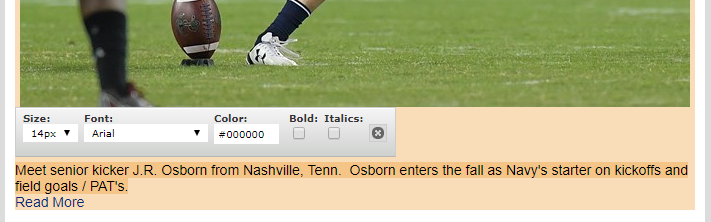
From here you can make basic edits like making the text bold or changing the color of the headline. Just click once on those areas and choose from the options.
If you would like to completely change the story, double-click on the area and this will bring you back into the initial action window and where you can change the display template and change the story.
Events/Results
If say you wanted to add some upcoming events or recent results, you can click on one of these tabs and then have the option for all sport or choosing a specific sport and then can choose between 1 and 10 events.
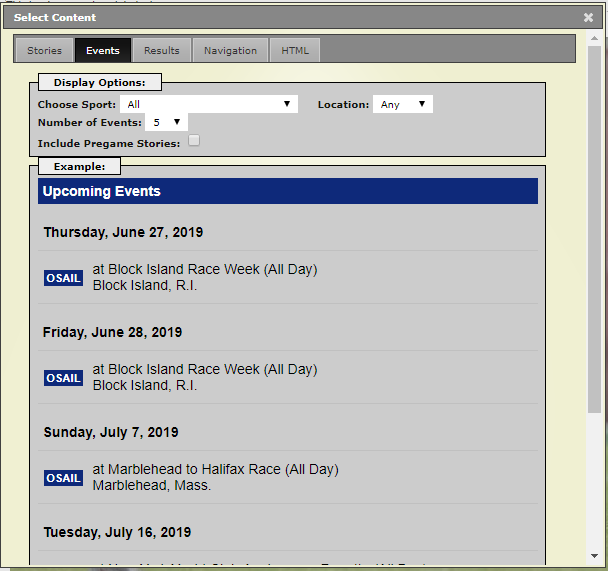
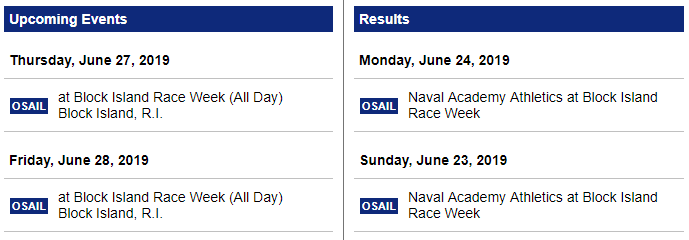
After making your choices, scroll to the bottom and hit set content. In this example, we put events in one column and results in another, here's the outcome:
Navigation
The navigation tab will allow you to insert links to all of your sport pages. Click on the tab and then you can choose to include the general sport and if you would like the navigation to be grouped by gender or not.
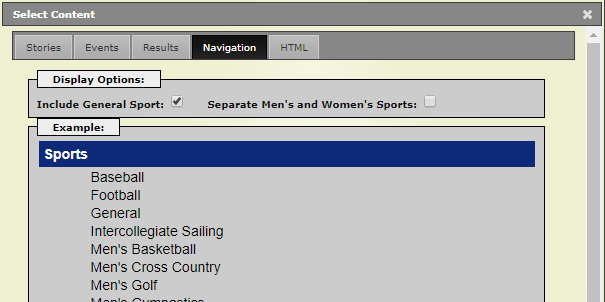
Clicking on Set Content when ready will insert this into the e-mail blast.
HTML
The HTML option will provide some flexibility for you to insert virtally any type of content you want into the e-mail designer.
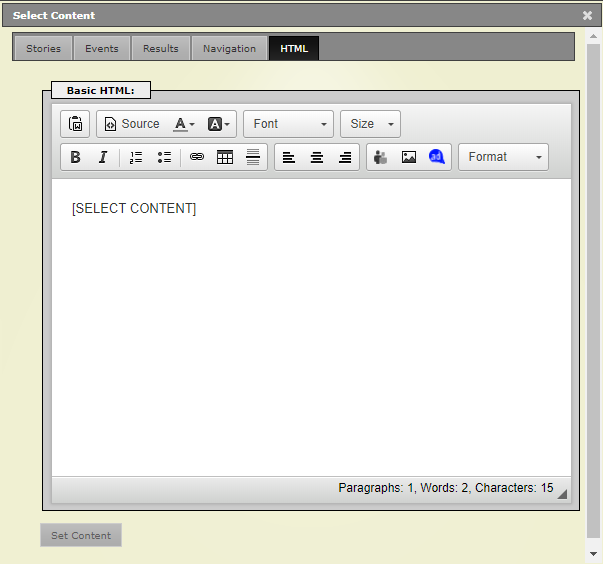
Using the abbreviated text editor, you can add images, tables, text, or insert an existing ad space from the site using the new ad button.
TIP: You can also use the HTML tab when inserting a story, to further edit the content of it. Simply choose a story, then double-click on the window and instead of choosing a new story, click on the HTML tab and edit the content from there.
Was this article helpful?
That’s Great!
Thank you for your feedback
Sorry! We couldn't be helpful
Thank you for your feedback
Feedback sent
We appreciate your effort and will try to fix the article