To protect a document you're adding to the system, such as a PDF, Word or Excel document, click on Media > Documents > Add New Document. Similar to sport files, you will be presented with a list of access groups towards the bottom (as shown in the screenshot below). Simply choose a group and click the right arrow button.
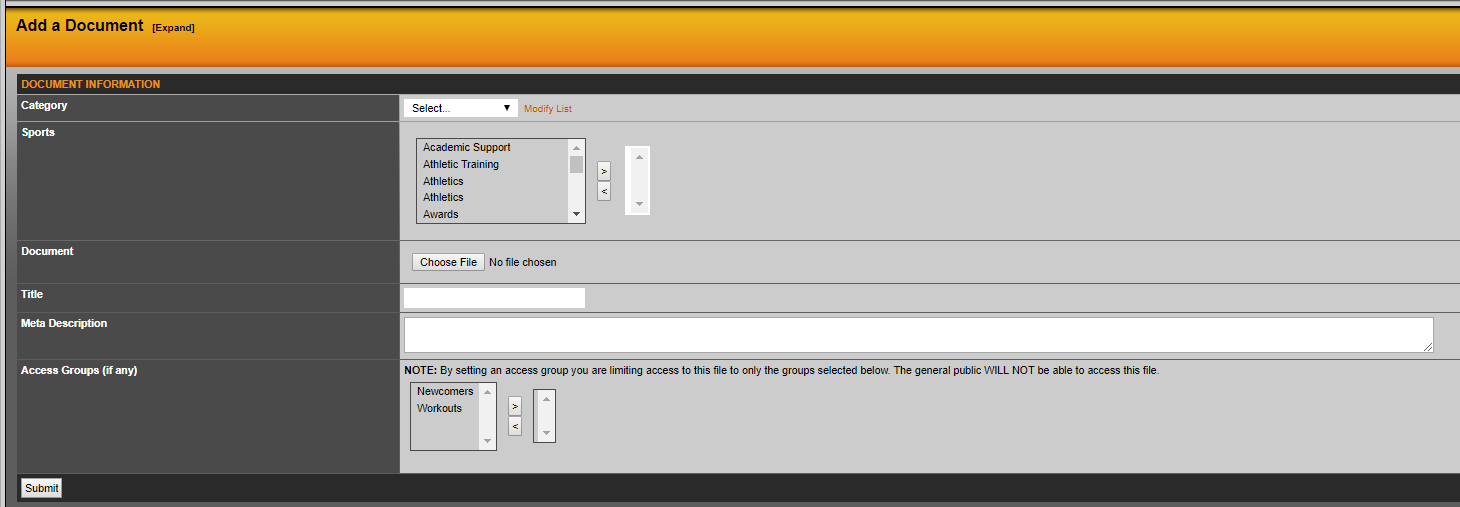
Note that the Document Batch Upload feature will not work with protected access. If you would like to protect document that are part of a batch upload, you first need to import them regularly on the backend, then find the document after it has been uploaded and click Edit.
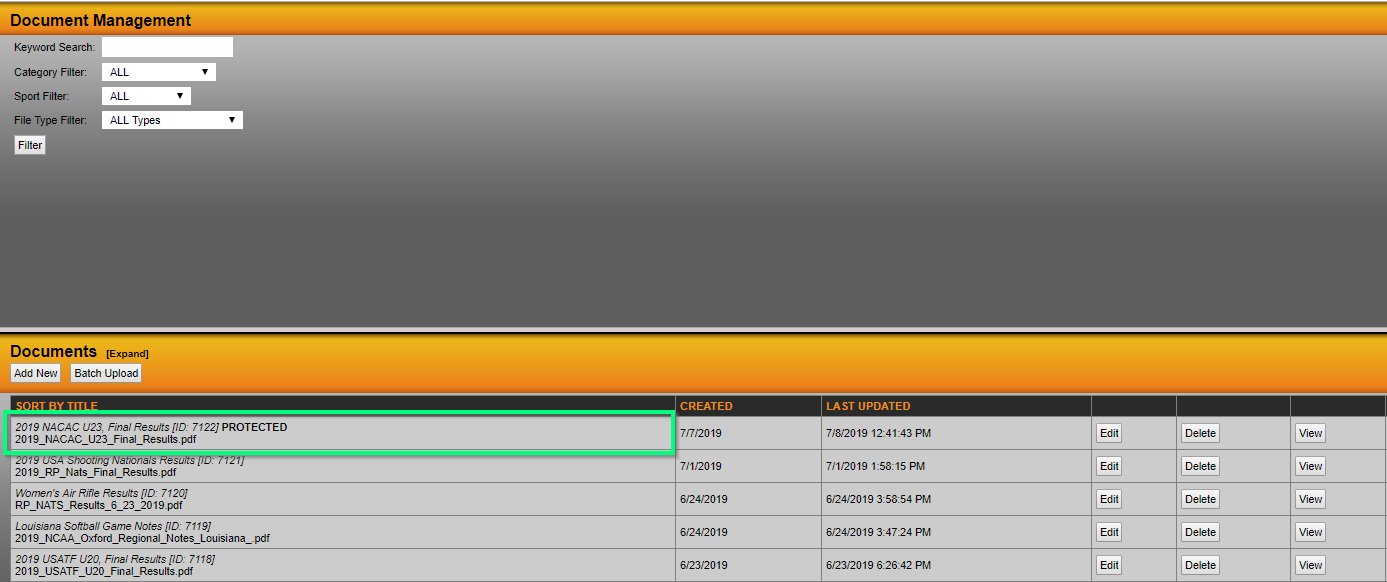
You can find the document by using the browsing options as seen in the screenshot below, then by clicking Filter. If a document is already protected, the word PROTECTED will appear alongside the name of the document. If you would like to change the protected status of a document, click Edit next to the document filename, and then you will be presented with a screen similar to the one above where you can adjust access groups.
Was this article helpful?
That’s Great!
Thank you for your feedback
Sorry! We couldn't be helpful
Thank you for your feedback
Feedback sent
We appreciate your effort and will try to fix the article